June 6, 2013
Today is a day we have waited over 2.5 years for. A truck with our name on it has been reserved to haul all the finds we’ve collected since we purchased the land in 2010. Since purchasing the lot we have been dreaming, collecting, praying, working hard, saving…… and our Davidson home has become a storage unit of sorts. We’ve juggled buying and storing things in our 1281 square ft home, and it all came to a head last night. I decided it would be wise to move everything we had been hoarding storing downstairs so that we were not running all over the house, up and down stairs to pack the truck today. I assume this will have been a wise choice tonight when we are actually loading said truck. You see…. since last summer after choosing a builder we decided to go about this process slightly unconventionally. Our builder included all the bells and whistles in our contract (lights and appliances). But after seeing his items, we knew we wanted “nicer” things. After-all, we currently live in the builder-basic world, we don’t want to do that again if we can help it. So, we politely declined most of our lighting options and all of the appliance options and chose to go out on a hunt for our own things. In August we found a fridge at a great price, so we bought it and had it delivered. Cue the hoarding to commence. From there we kept our eyes peeled for a down-draft cook top, a wall oven and a dishwasher. All of which were found as “open box” items over the following months. As far as the lighting- that didn’t exactly go as planned. You see, pretty lights = expensive, and having forked over 10% down at closing, and deciding to take a trip to Hawaii, our wallets were growing thinner. So, sacrifices were made…. but those are easy changes down the road. We didn’t compromise 100%, we did find and order a few special lights that will be fun conversation pieces. These items were all delivered to the builder’s storage unit a few months ago, so it was a great relief to get our dining and living rooms back when they were gone. Not the same can be said for our upstairs. Since closing the loan we’ve been on the look out for furniture…. having a house is great, but having a place to sit and sleep…. well, even better! And to be completely honest, this process didn’t start just a few months ago, it actually began shortly after we purchased the lot. I was in Target one evening and spotted some really nice patio furniture 90% off…. Since we didn’t have a large enough car to cart it all home, Jeremy’s family went searching the Durham Targets for these pieces. They came home with the mother-load and it’s been all boxed up and sitting in their garage since then. I cannot wait to get those chairs and tables all put together on the deck tomorrow! We’ve also collected the following…. My 4-post bed from the house I grew up in (it’s been stored at my dad’s), 2 headboards from a cyber Monday sale on Joss & Main, 4 dining chairs from a cyber Monday sale on Serena & Lilly, 12 bed pillows from Belks (bought with a Christmas gift card), linens for 4 of the 6 beds (from Pottery Barn Kids, TJ Maxx and Marshalls), navy pots and pans (also from Marshalls), 12 wine glasses, 12 beer glasses, bath towels (Target)…. and lots of other little things. Wish us luck as we pick up our new mattresses from Original Mattress and then trek across NC to collect all the items tomorrow morning & go unpack the house!
June 4, 2013
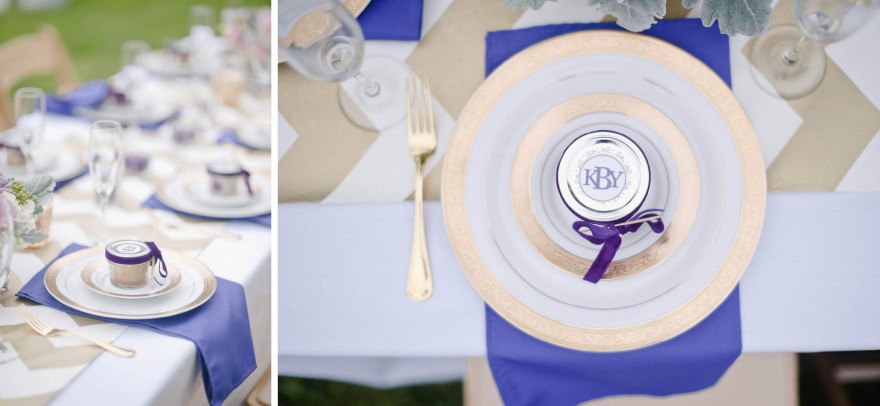
So let’s just say the month of May consisted of all things Karen. Since she moved half way across the country to Waco, Texas upon getting engaged- she was going to be missing out on many wedding related festivities… and I didn’t want a proper bridal shower to be left out! Venue: Ayr Mount in Hillsborough, NC Cake: Maxie B’s Rentals (tables, chairs, gold flatware, plates, tablecloths): Party Reflections Planning & Coordination: J Leigh Events Flowers: Bella Grace Floral Favors: Homemade blackberry cobblers (mini canning jars from Wal-Mart) Monogram stickers: Moo.com Food: Homemade Invitations: DIY Calligraphy for invitations: Calligraphy by Carrie Chevron runner: Paper Source
May 31, 2013
Because this is how you will very likely spend the night before your wedding if you’re a DIY junkie like me (and Karen). Flowers aren’t something that you can arrange weeks or months before your wedding date, they’re something that must be done as close to the the moment they’re needed as possible. After the fun of a rehearsal & dinner…. us ladies spent 4+ hours arranging 6 bouquets, 10 boutonnieres, 3 corsages, and as many table arrangements as we could muster. While I love this kind of work, not everyone does, nor does everyone ooze floral talent…. be considerate to your friends and your own sanity when choosing to DIY. I’m not judging any of you DIY brides… I’m one of you too! Less than an hour before saying “I do” my girls and I were furiously tying ribbon on all our bouquets. Don’t put too many items on your in-the-last-24-hours-to-do-list. You might go bat sh!t crazy. Interested in making a bouquet? Here’s a great video from Style Me Pretty and here’s one from Blooms by the Box (a great resource for wholesale flowers!) Interested in making a centerpiece or two? Check out my tutorial below. When I hosted Karen’s bridal shower I had Bella Grace make me some beautiful centerpieces for the tables. Once the shower was over and the flowers were looking sad, I went to deconstruct the arrangement to toss the flowers and realized a trick they used to make the flowers stand up so nice. They used cube vases, about 5×5 square, and made a tic-tac-toe board with tape across the top of the vase. This provided stability to the flowers in the center and kept them from falling out to the sides of the vase. We used the same technique when arranging the centerpieces for Karen’s wedding day. For my example below, I picked up some white hydrangeas (3 stems), pale peach roses (12), baby’s breath (one bunch) and some kind of fern-like filler from Whole Foods (which OMG they have the best selection of grocery store flowers EVER…. found peonies there last week!) I bought all these for $32. This was enough to make one large-ish centerpiece… now, I don’t mean giant like this…. but it was really full! I did learn that square vases can be tricky- because of how the flowers lay out to the side, the stems don’t stay down well… so the water level has to stay high. This morning when I got up, one the the hydrangea’s looked a little sad…. so I ended up taking the arrangement apart and splitting it into 3 containers (the square vase I started with and 2 mason jars) Step 1: Buy pretty flowers! Step 2: Pick a vase and do the tic-tac-toe tape across the top. I just used scotch tape, but there’s probably something made for this. Step 3: (this is likely wrong, but it’s how I did it) Take the largest flowers (hydrangea) and cut the stems and remove the leaves. Place in vase where you want them. I say it may be wrong because you could start with the filler first. Step 4: Add smaller flowers in (roses) Step 5: Add the next flower in (baby’s breath), and continue until all flowers are used. Step 6: Add filler (fern-like stuff) ** When adding the smaller flowers into a large bloom like a hydrangea, I pulled the blooms of the hydrangea apart and put roses and babys breath inside the one bunch of hydrangea. Step 7: Enjoy 🙂


